Cloudflare Tunnel内网穿透
要让本地知识库被外部访问,通常需要将局域网中的服务暴露到公网上。我们可以使用内网穿透工具创建一个安全的隧道,将本地服务映射到一个公网可访问的地址上。这里主要介绍Cloudflare Tunnel。

ngrok是我接触到的第一个内网穿透工具,但是不开代理的情况下无法工作,不得不找另外一个比较靠谱的工具。偶然了解到Cloudflare也提供这项服务,自然就想了解这一个工具。
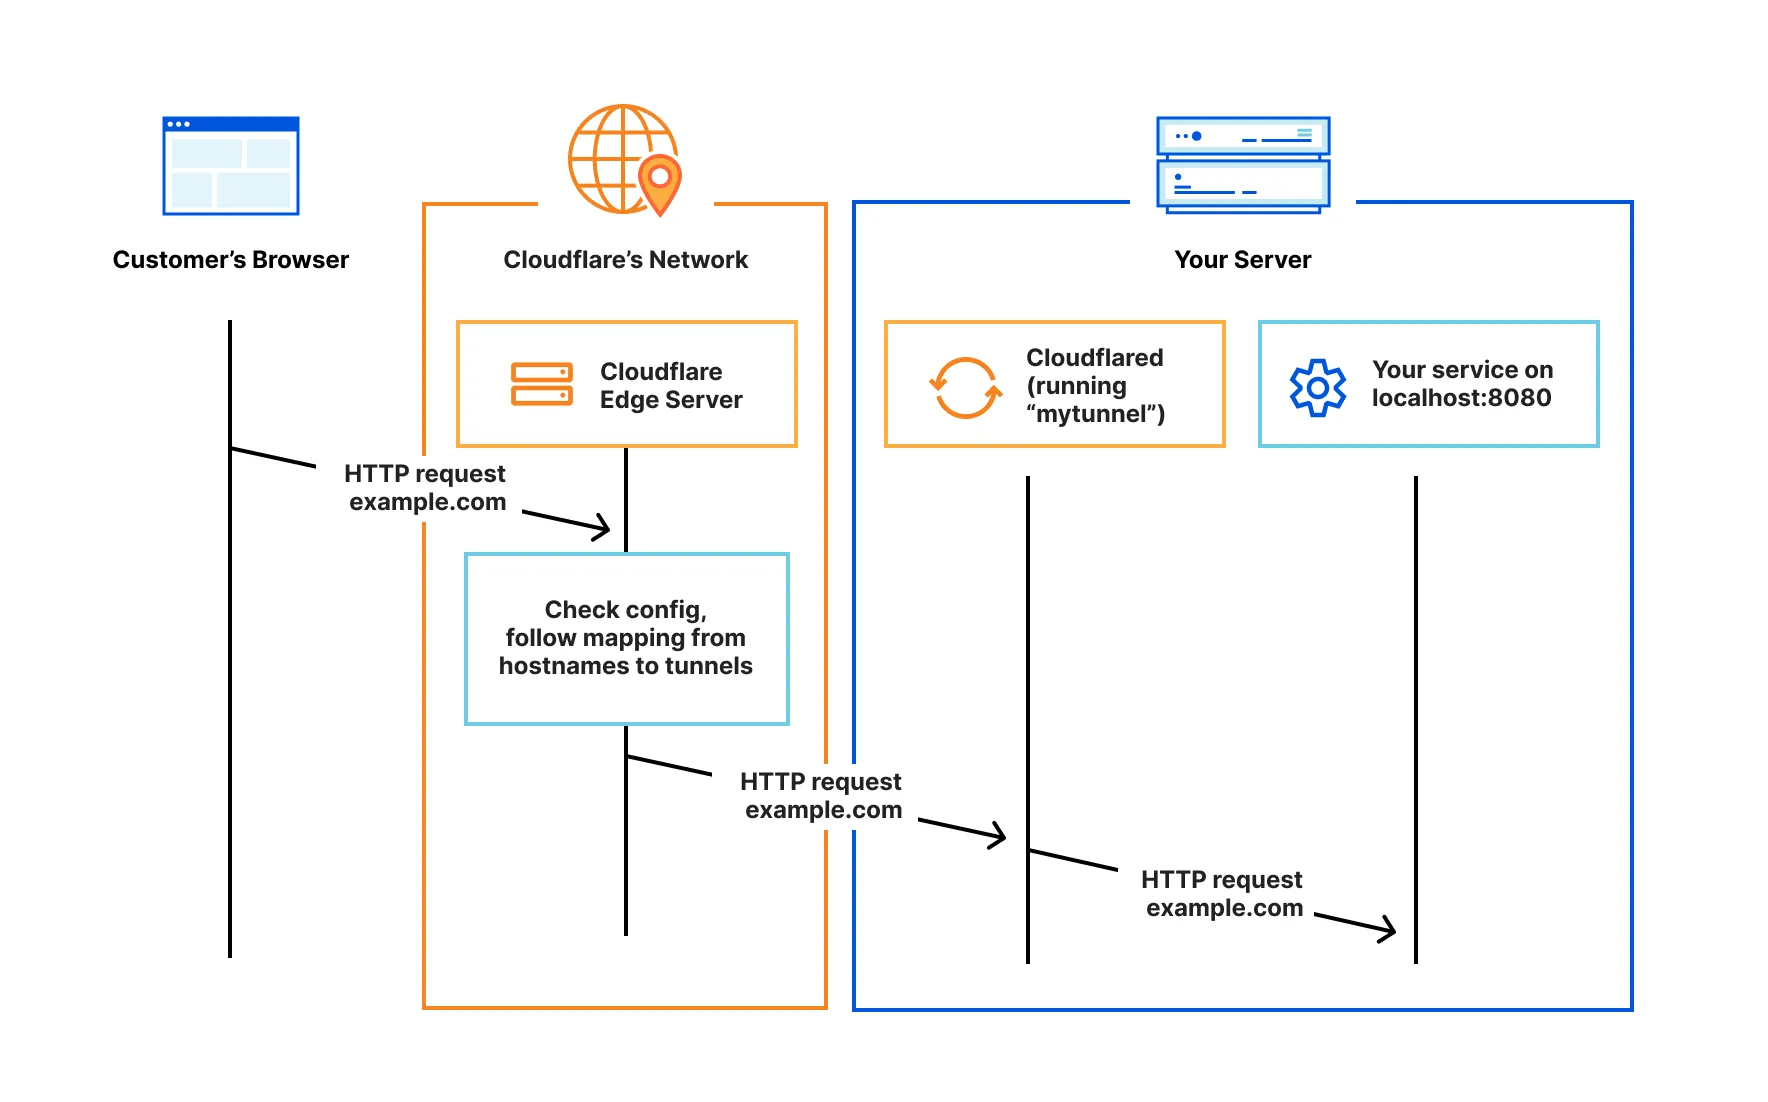
Cloudflared establishes outbound connections (tunnels) between your resources and Cloudflare's global network. Tunnels are persistent objects that route traffic to DNS records. Within the same tunnel, you can run as many 'cloudflared' processes (connectors) as needed. These processes will establish connections to Cloudflare and send traffic to the nearest Cloudflare data center.
临时测试
如果你只是想临时测试下穿透的效果,只需要简单执行两个命令(Macbook为例):
# Download and install cloudflared via Homebrew
brew install cloudflared

# Run the following terminal command to start a free tunnel
cloudflared tunnel --url http://localhost:8080第一个是Cloudflare的安装命令;第二个是将本地运行的服务穿透到随机生成的外网。第二个命令后会生成一个外部可以访问的临时域名,临时测试的域名不是固定的,且连接的稳定性会差一些,但使用非常方便。
Run as Service
You can install cloudflared as a system service on macOS. Before you start, make sure you:
# Download and install cloudflared
brew install cloudflared

# Authenticate cloudflared
cloudflared tunnel login

# Create a tunnel and give it a name
cloudflared tunnel create <NAME>

# Confirm that the tunnel has been successfully created.
cloudflared tunnel list
After create the tunnel, you need to create a config.yml in ~/.cloudflared directory:
# Search `cat << EOF >` command to know about its function.
cat << EOF > ~/.cloudflared/config.yml

tunnel: <tunnel_id>
credentials-file: ~/.cloudflared/<tunnel_id>.json
protocol: http2

ingress:
  - hostname: <host_name>
    service: http://localhost:4000
  - service: http_status:404

EOF
Confirm that the configuration file has been successfully and install the tunnel service:
# Check the configuration
cat ~/.cloudflared/config.yml

# Cloudflare Tunnel will be installed as a launch daemon and start whenever your system boots.
sudo cloudflared service install
After install the service, you can start routing traffic.
# Assign a CNAME record that points traffic to your tunnel subdomain:
cloudflared tunnel route dns <UUID or NAME> <hostname>

# Run the tunnel with log
cloudflared tunnel --loglevel debug run <tunnel_DI>
常见的指令
# List Active Tunnels.
cloudflared tunnel list

# Stop and restart the service
sudo launchctl stop com.cloudflare.cloudflared
sudo launchctl start com.cloudflare.cloudflared


