私有知识库对接企业微信
近期工作需要,得建立一个本地知识库问答机器人,并接入企业微信,所以不得不去以外行人的视角去了解企业微信开发。这里简单总结下相应的知识点。

建设私有知识库的开源平台越来越多,而且使用越来越简单。之前对接企业微信是一件比较麻烦的事情,现在有一些知识库如MaxKB(专业版)、AStrBot,已经将企业微信的对接功能集成到知识库里面。相信未来其它流行的大模型应用平台如Dify AI,RAGFlow,也会支持企业微信的对接。
MaxKB对接企业微信
MaxKB的安装目前是最简单的,只需要以下一个命令:
docker run -d --name=maxkb --restart=always -p 8080:8080 -v ~/.maxkb:/var/lib/postgresql/data -v ~/.python-packages:/opt/maxkb/app/sandbox/python-packages 1panel/maxkb安装好后用默认账号与密码访问http://your_server_ip:8080,本地安装的访问localhost:8080或者127.0.0.1:8080:
- username: admin
- password: MaxKB@123..
登陆后的配置可参考官网,操作非常简单。
获取企业微信的信息
登陆企业微信,在【我的企业】里面获取企业ID:
- 企业ID
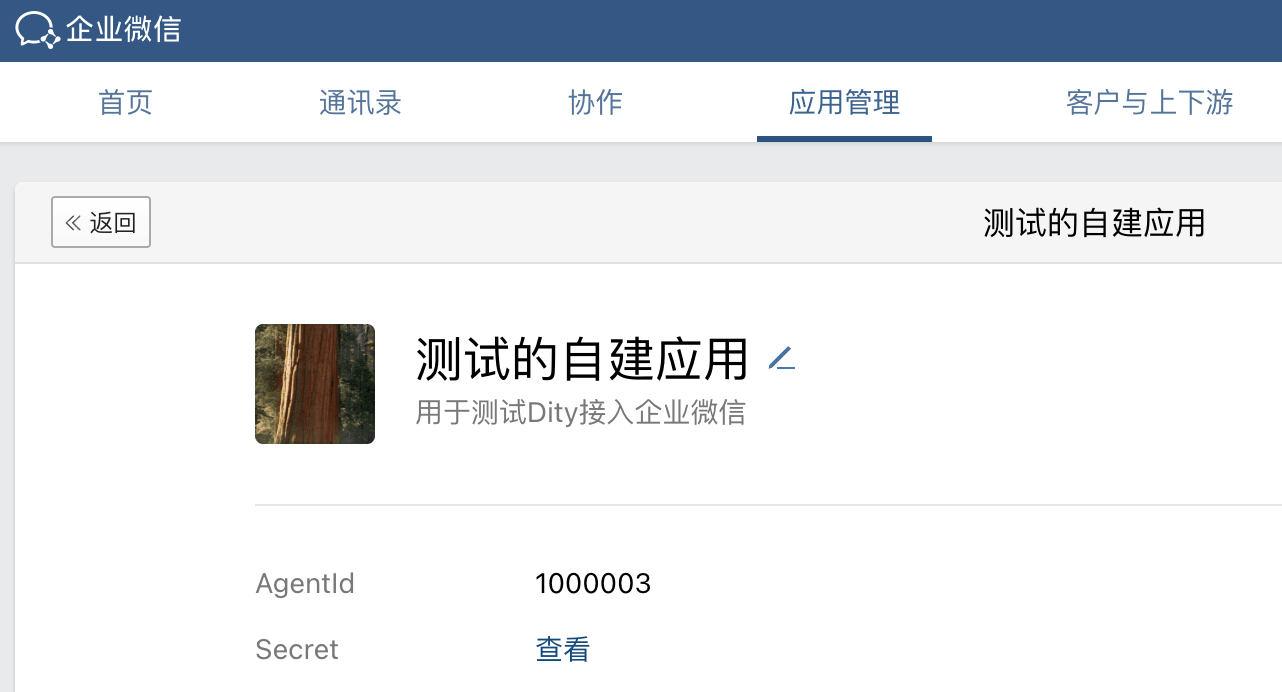
在【应用管理>自建】里面创建一个应用。创建好自建应用后会获得两个信息:
- AgentId
- Secret
在自建应用里的【API接收消息】里面设置API接收,可随机生成两个信息:
- Token
- EncodingAESKey
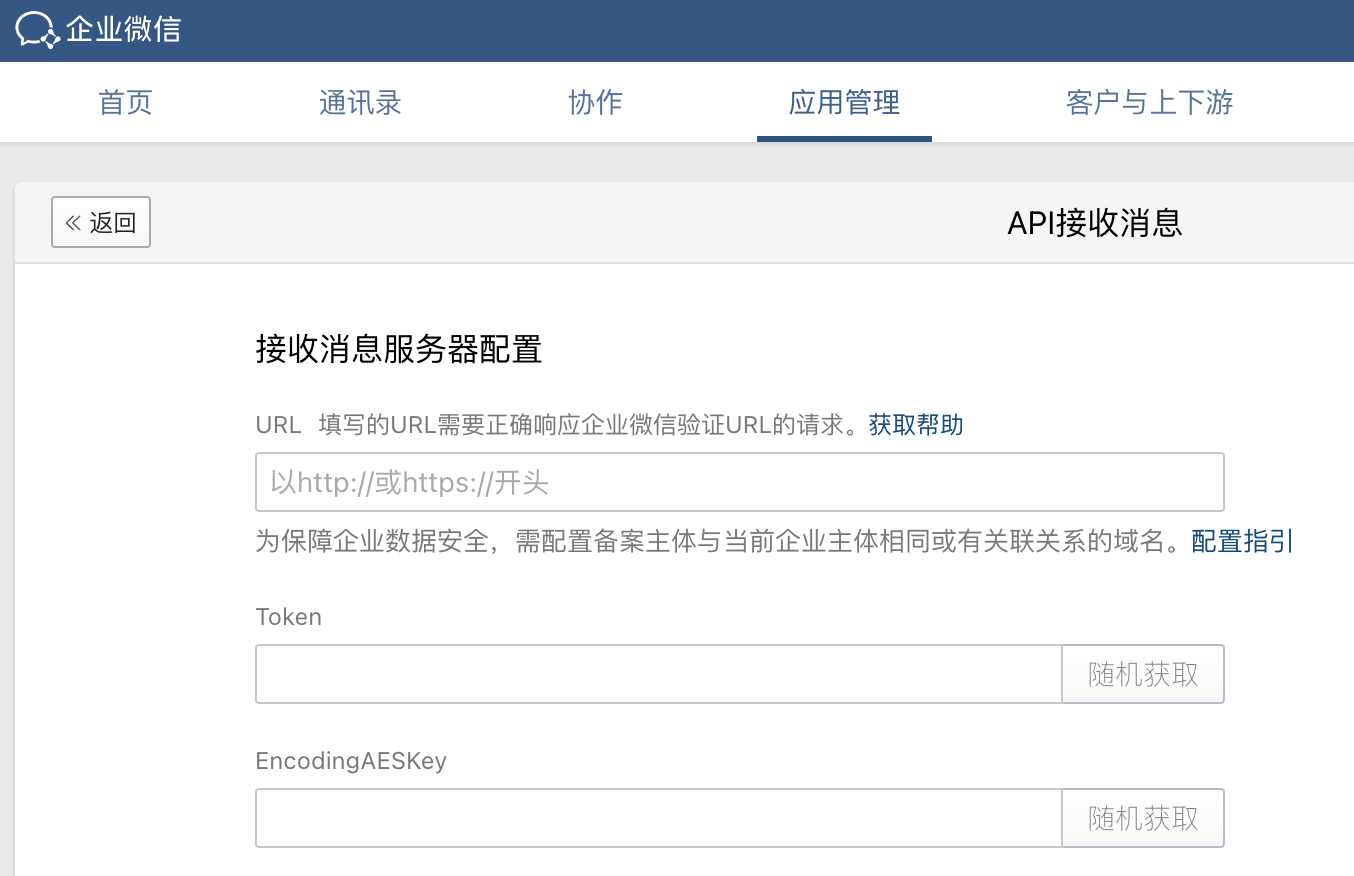
其中的URL是后面生成的,格式为http://ip:port/wxcomapp,输入URL之前,这个页面暂时无法保存。
企业微信功能-发送消息
发送消息是使用管理工具中的“消息群发”或API发送消息。使用API的Python代码如下:
import requests

CORP_ID = ""
CORP_SECRET = ""

# 请求 Access Token
def get_access_token():
    url = f"https://qyapi.weixin.qq.com/cgi-bin/gettoken?corpid={CORP_ID}&corpsecret={CORP_SECRET}"
    response = requests.get(url).json()
    return response.get("access_token")

access_token = get_access_token()
print("Access Token:", access_token)

# 发送文本消息
def send_text_message(user_id, content):
    url = f"https://qyapi.weixin.qq.com/cgi-bin/message/send?access_token={access_token}"
    data = {
        "touser": user_id,  # 接收人(可以是多个,用 '|' 分隔)
        "msgtype": "text",
        "agentid": 1000003,  # 你的企业微信应用ID
        "text": {"content": content},
        "safe": 0  # 0: 普通消息, 1: 保密消息
    }

    response = requests.post(url, json=data).json()
    return response

# 发送消息
result = send_text_message("user_id", "你想吃什么")
print(result)

# 发送 Markdown 消息

def send_markdown_message(user_id, content):
    url = f"https://qyapi.weixin.qq.com/cgi-bin/message/send?access_token={access_token}"
    data = {
        "touser": user_id,
        "msgtype": "markdown",
        "agentid": 1000003,
        "markdown": {"content": content},
        "safe": 0
    }

    response = requests.post(url, json=data).json()
    return response

# 发送 Markdown 消息
markdown_text = "### 任务通知 \n **任务名称:** 开发测试 \n **状态:** 进行中 🚀"
result = send_markdown_message("user_id", markdown_text)
print(result)
企业微信功能-接收消息
企业微信回调是指企业微信在特定事件发生时(如用户发送消息、通讯录变更等),自动向开发者配置的URL发送通知或数据的机制。这种机制允许开发者实时获取事件信息,并进行相应的业务处理。
通过企业微信回调,当用户向自建应用发一条消息时,我们搭建的后台如Dify可以读取用户的消息并发送相应的内容。其实Dify运行之后只有一个类似于http://localhost/v1这样的API接口,这个接口是无法直接与微信的API接口对接的,这时候需要一个中间的Web的Server。
这个Server可以接收企业微信的消息,可以调用Dify的API来生成想要的内容,也可以装生成的内容发送给企业微信。Web Server可以用诸如PHP, Flask, Django等架构来做。这里选择最简单的Flask.
这里采用Python Flask的Web架构,企业微信自带的调试工具进行调试,Flask服务大的代码采用这位大神的代码。测试通过后便可以部署到云端,注意一定需要用与企业相关的备案域名与服务器,这是企业微信的限制,否则即使测试通过也会显示:OpenAPI回调地址请求不通过。
from flask import Flask
from flask.globals import request
from Crypto.Cipher import AES
import base64,hashlib,xmltodict,json
app = Flask(__name__)
# 检查base64编码后数据位数是否正确
def check_base64_len(base64_str):
len_remainder = 4 - (len(base64_str) % 4)
if len_remainder == 0:
return base64_str
else:
for temp in range(0,len_remainder):
base64_str = base64_str + "="
return base64_str
# 解密并提取消息正文
def msg_base64_decrypt(ciphertext_base64,key_base64):
# 处理密文、密钥和iv
ciphertext_bytes = base64.b64decode(check_base64_len(ciphertext_base64))
key_bytes = base64.b64decode(check_base64_len(key_base64))
iv_bytes = key_bytes[:16]
# 解密
decr = AES.new(key_bytes,AES.MODE_CBC,iv_bytes)
plaintext_bytes = decr.decrypt(ciphertext_bytes)
# 截取数据,判断消息正文字节数
msg_len_bytes = plaintext_bytes[16:20]
msg_len = int.from_bytes(msg_len_bytes,byteorder='big', signed=False)
# 根据消息正文字节数截取消息正文,并转为字符串格式
msg_bytes = plaintext_bytes[20:20+msg_len]
msg = str(msg_bytes,encoding='utf-8')
return msg
# 消息体签名校验
def check_msg_signature(msg_signature,token,timestamp,nonce,echostr):
# 使用sort()从小到大排序[].sort()是在原地址改值的,所以如果使用li_s = li.sort(),li_s是空的,li的值变为排序后的值]
li = [token,timestamp,nonce,echostr]
li.sort()
# 将排序结果拼接
li_str = li[0]+li[1]+li[2]+li[3]
# 计算SHA-1值
sha1 = hashlib.sha1()
# update()要指定加密字符串字符代码,不然要报错:
# "Unicode-objects must be encoded before hashing"
sha1.update(li_str.encode("utf8"))
sha1_result = sha1.hexdigest()
# 比较并返回比较结果
if sha1_result == msg_signature:
return True
else:
return False
@app.route("/",methods=["get"])
def wx_check_api():
EncodingAESKey = ""
token = ""
msg_signature = request.args.to_dict().get("msg_signature")
timestamp = request.args.to_dict().get("timestamp")
nonce = request.args.to_dict().get("nonce")
echostr = request.args.to_dict().get("echostr")
# 获取消息体签名校验结果
check_result = check_msg_signature(msg_signature,token,timestamp,nonce,echostr)
if check_result:
decrypt_result = msg_base64_decrypt(echostr,EncodingAESKey)
print("通过")
return decrypt_result
else:
return ""
if __name__ == "__main__":
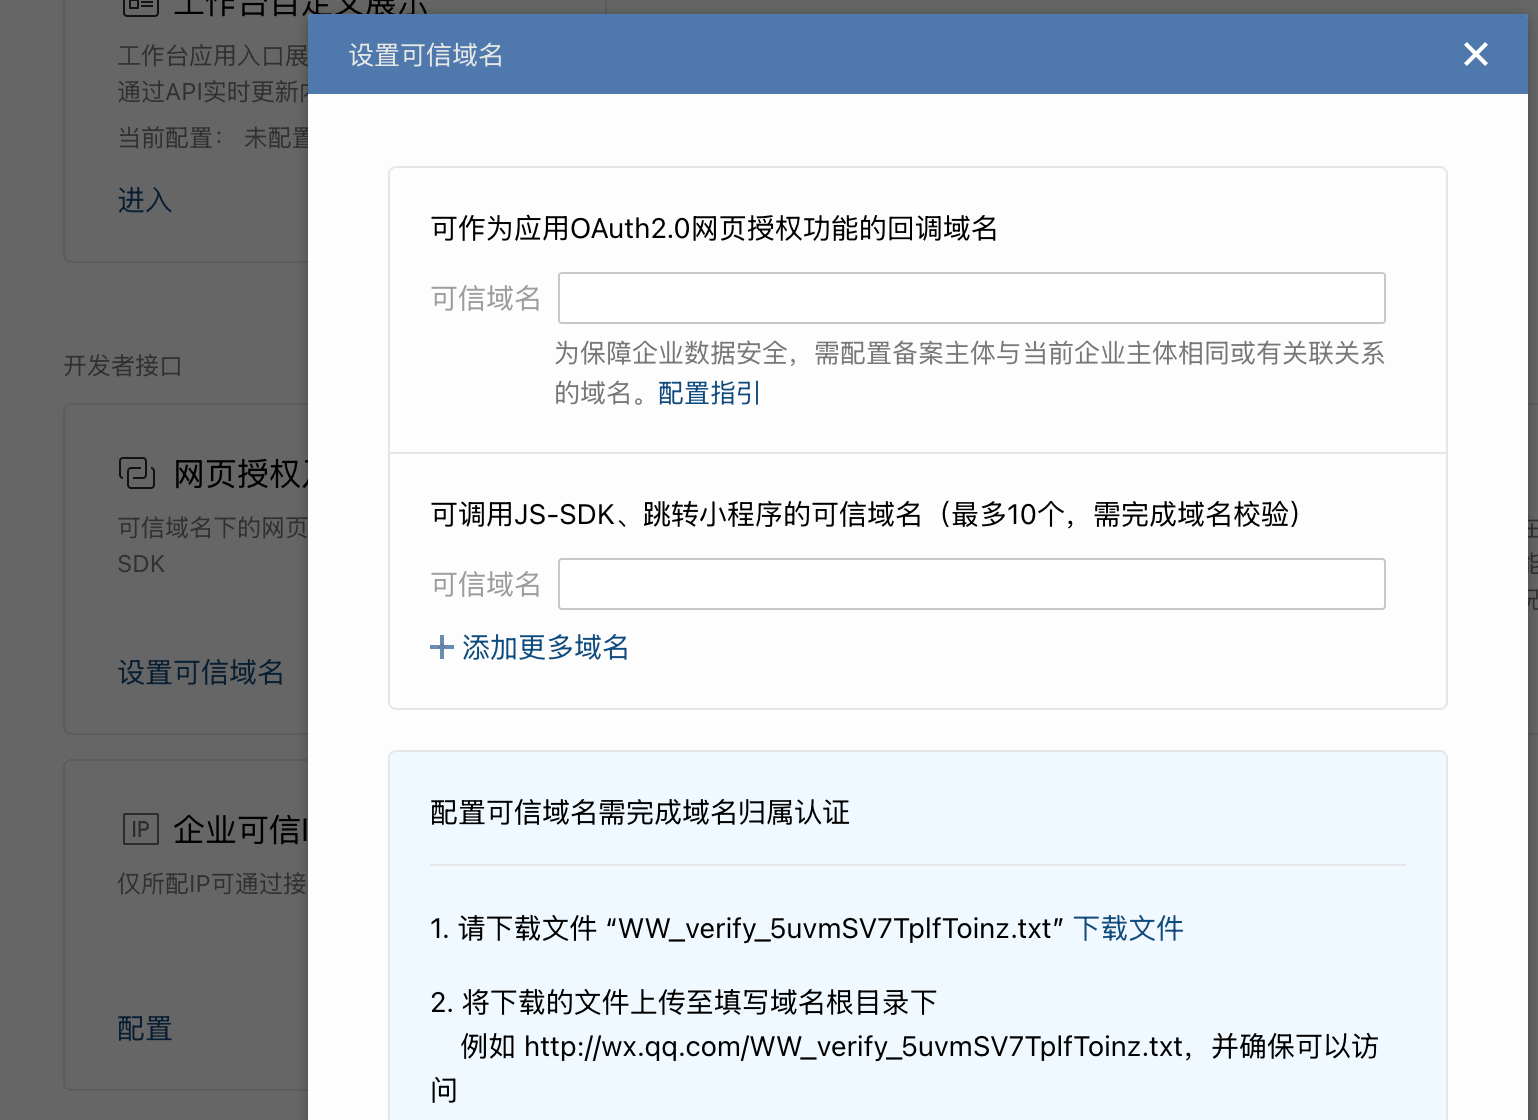
app.run(debug=False,host='0.0.0.0',port=6363)设置可信域名(不推荐,仅了解)
出于安全的考虑,企业微信API是有一些限制的。如果需要通过接入企业微信的API,首先需要设置可信域名。其实就是输入企业的备案的域名,然后域名对应的主机的根目录上需要上传以下页面下载的WW_verify_5uvmSV7TplfToinz.txt文档。
如果是Docker本地部署的Dify,为了能够确保可以访问:
http://localhost/WW_verify_5uvmSV7TplfToinz.txt需要将这个文档上传到localhost的根目录。如何在本地docker部署的Dify的根目录添加校验文档?以下是GPT的回答:
1. Ensure the File Exists in the Correct Directory
Place WW_verify_5uvmSV7TplfToinz.txt inside the Nginx root directory. Default root directory for Nginx in a Docker container is:
/usr/share/nginx/html/Docker Volumes is the most straightforward and recommended way to share files between your host machine and your Docker container. Choose a location on your computer where you'll keep this verification file. For example, you could create a folder named host_directory in your Dify project directory. Place the WW_verify_5uvmSV7TplfToinz.txt file inside this folder. Then Mount the volume in your docker-compose.yml .
version: '3.8'
services:
  dify:
    # ... other Dify configurations ...
    volumes:
      # Mount the vloume bewteen host machine and docker container.
      # Replace with the actual web server root in your Dify container.
      - ./host_directory:/usr/share/nginx/html
Replace ./host_directory with the absolute or relative path to the folder you created on your host machine and /usr/share/nginx/html with the correct path inside your Dify container.
Run the following command on your host machine (not inside the container) to ensure that the Nginx user has the necessary permissions to read the file:
# absolute or relative path to the folder you created on your host machine.
sudo chown -R $(whoami):$(whoami) ./host_directory
sudo chmod -R 755 ./host_directory
2. Check Nginx Configuration
If Nginx is not serving static files correctly, update the configuration file:
# Update default.conf.template in docker directory.
server {
    listen 80;
    server_name localhost;

    root /usr/share/nginx/html;
    index index.html index.htm;

    location / {
        try_files $uri $uri/ =404;
    }

    location ~* \.(txt)$ {
        root /usr/share/nginx/html;
        allow all;
        autoindex on;
        add_header Content-Type text/plain;
    }
}
3. Restart Nginx and Docker
After making changes, restart Nginx:
docker-compose down
docker-compose up -d把校验文档放在localhost的根目录有一个坏处,Dify的服务器只能做一些简单的企业微信消息发送,不能做回调。


